
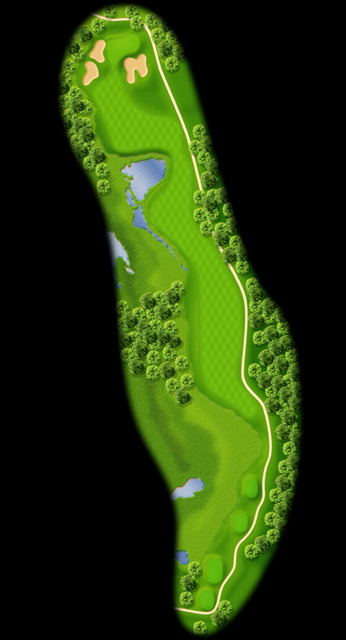
Course Layout
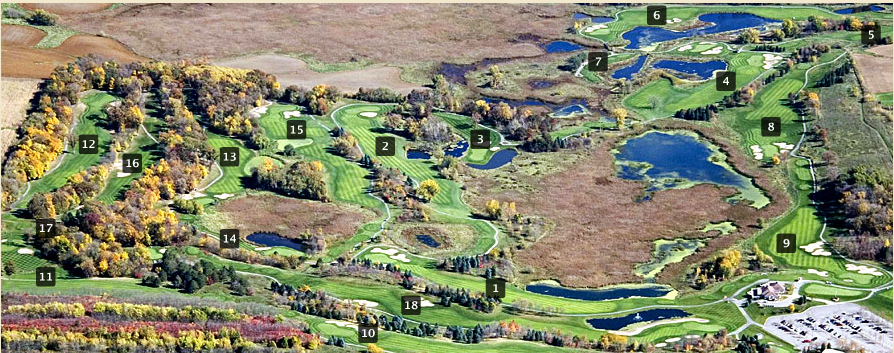
Course Tour
-
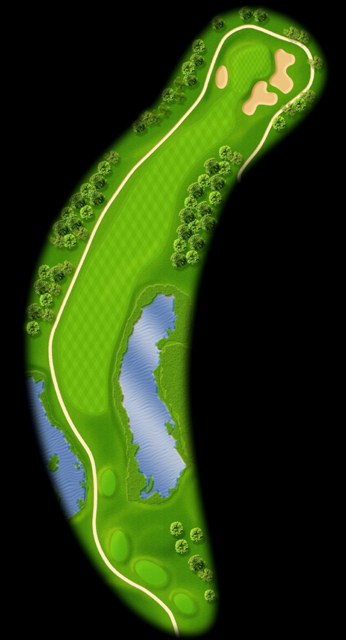
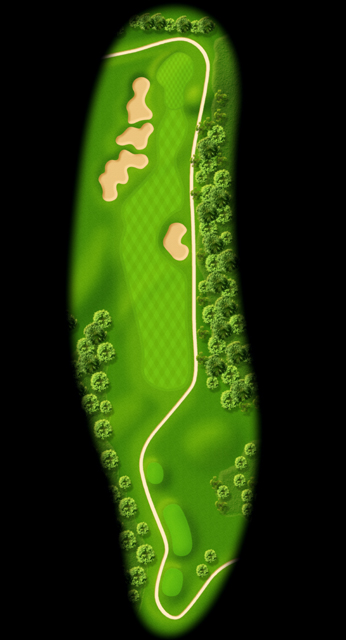
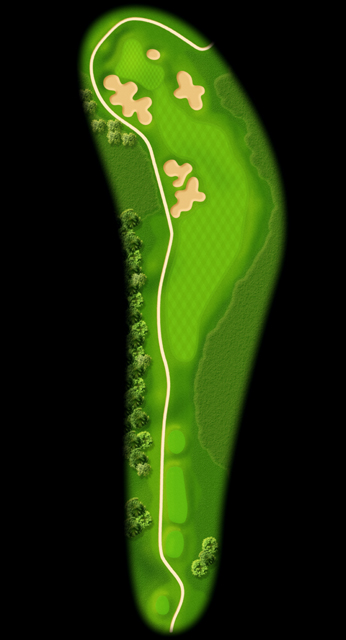
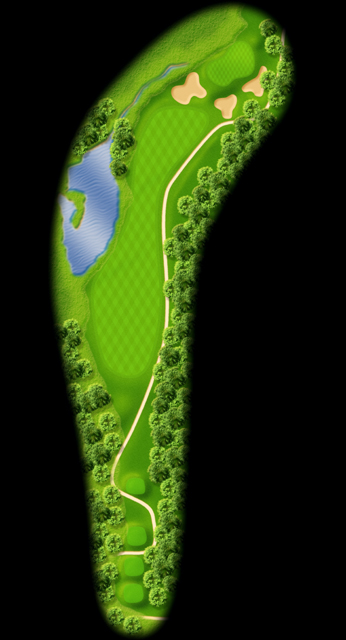
Hole #1
A great opening hole, aim at the small tree on the far side of the fairway. An ideal tee shot plays slightly left to right. Because of the elevated tee, long hitters may want to go with less than a driver. The second shot plays slightly uphill so take an extra club. Make a four and your off to a good start!
- PAR 4
- HCP 5
- Tournament: 399
- Championship: 374
- Regular: 353
- White: 310
-
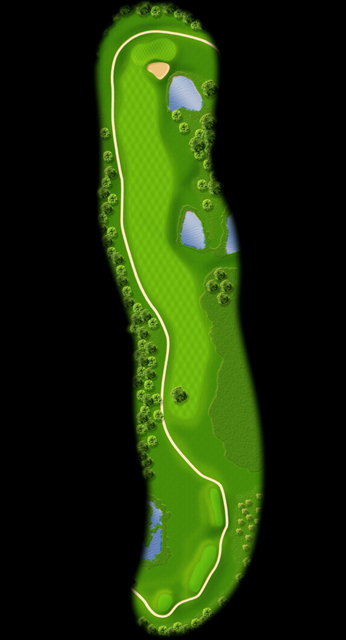
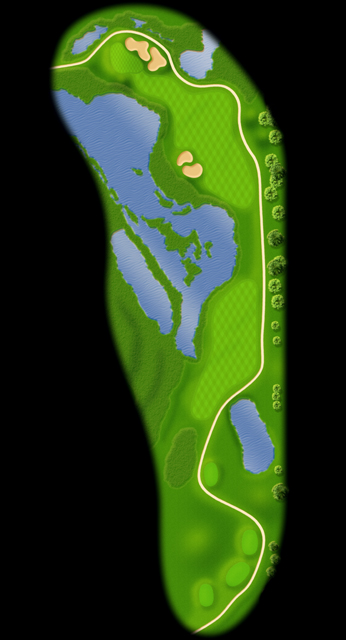
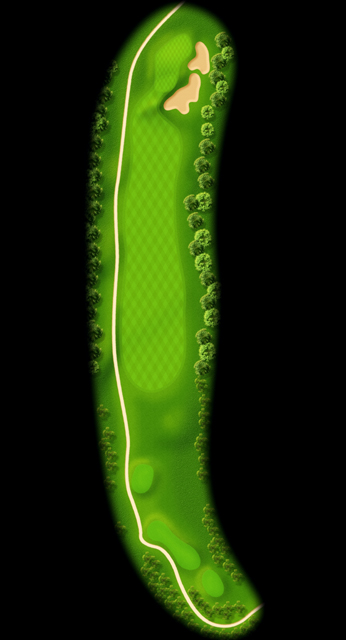
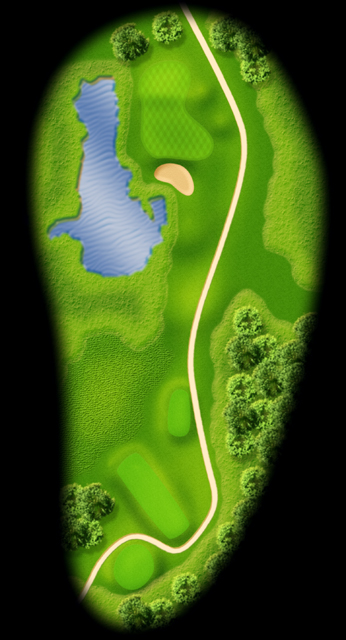
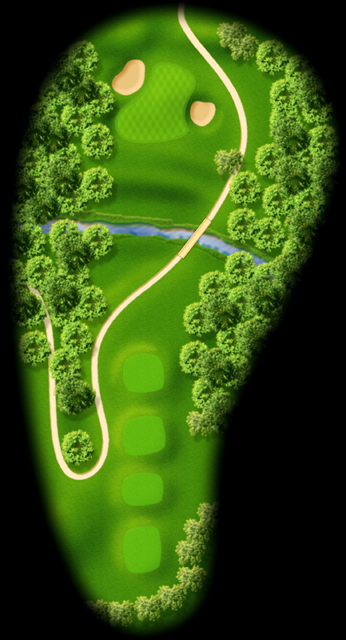
Hole #2
A reachable par 5. Play your tee shot at the large oak in the background. Water guards the right side of this hole all the way. If you can’t reach it in two play your second shot to the left side of the fairway to open up the green on your third. Make sure to get on the correct side of the spine the separates the center of this long horizontal green.
- PAR 5
- HCP 7
- Tournament: 504
- Championship: 487
- Regular: 472
- White: 417
-

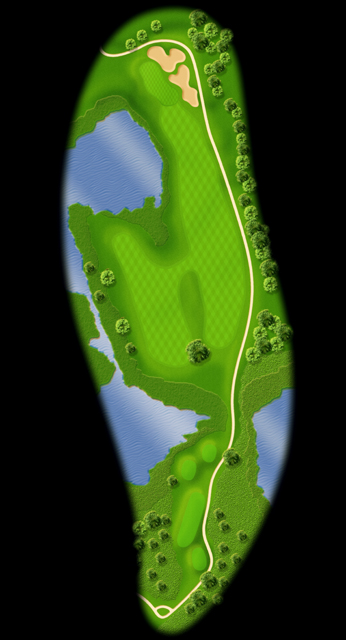
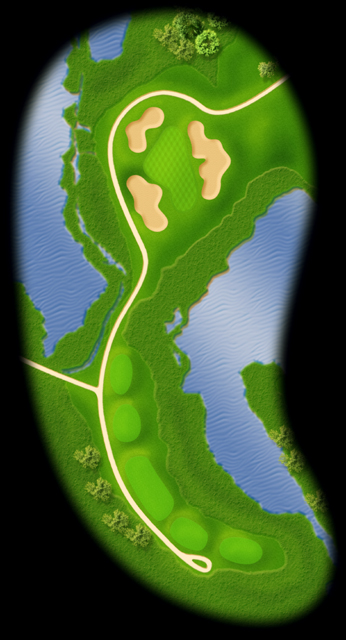
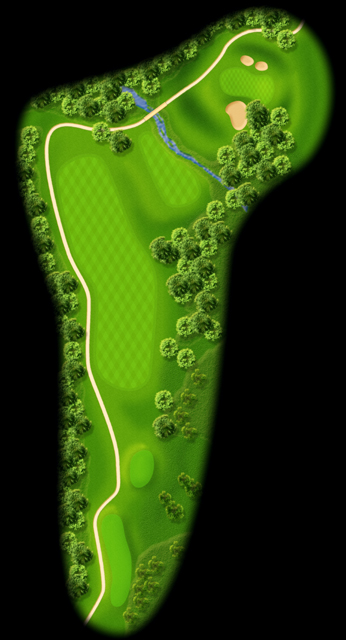
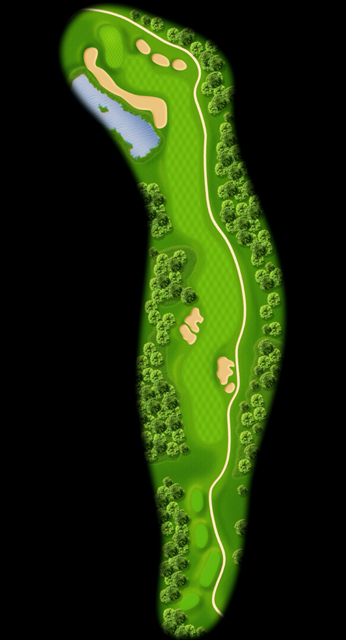
Hole #3
Club selection is key as this green is guarded left and right by water and a huge bunker protects the front. This hole plays anywhere from 104 to 185 and this long left to right sloping green requires an accurate tee shot.
- PAR 3
- HCP 11
- Tournament: 185
- Championship: 165
- Regular: 127
- White: 96
-
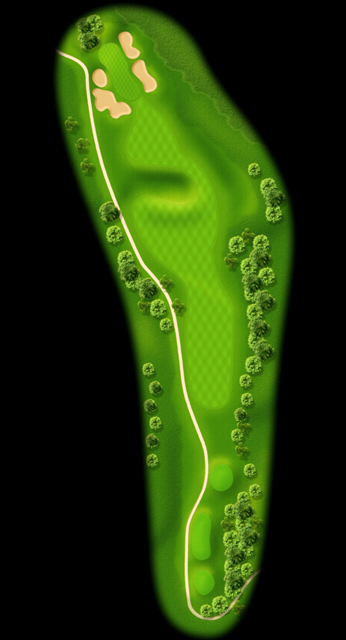
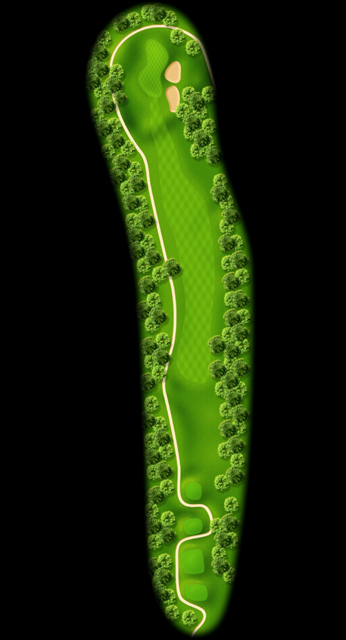
Hole #4
A solid 400 + yard par four. Play a slight draw to use the contour in the fairway. The approach is to a long narrow green guarded by bunkers on the right. Club selection is key as the green might be a 3 club difference from front to back.
- PAR 4
- HCP 3
- Tournament: 430
- Championship: 392
- Regular: 374
- White: 318
-
Hole #5
The shortest par 4 on the course, but don’t let it fool you. There’s a couple of huge bunkers in the landing area and another long narrow green can make club selection a key. Hit a good drive and this is definitely a chance for birdie.
- PAR 4
- HCP 17
- Tournament: 330
- Championship: 305
- Regular: 295
- White: 245
-
Hole #6
A three shot par 5 for most and there’s no bail out on this one! Take this one shot by shot. Play your tee ball to the first island fairway. The elevation will play a factor so for some it’s not a driver. Your second shot should be over or just to the right of the bunkers but be aware that there are two. This will leave you 100 – 125 left in. The green has a slight slope in the center so be sure to judge the approach correctly. 5 is a great score here!
- PAR 5
- HCP 1
- Tournament: 530
- Championship: 504
- Regular: 474
- White: 443
-
Hole #7
A really good par three that plays from 110 – 190. Play your tee shot right to left to avoid the greenside bunker. Another long narrow green makes pin location and club selection key.
- PAR 3
- HCP 9
- Tournament: 188
- Championship: 180
- Regular: 156
- White: 104
-
Hole #8
This par 4 plays down the hill and slightly right to left. There’s a generous fairway in the landing area. The second shot plays about a ½ club less than the yardage. Bunkers guard this green on both sides.
- PAR 4
- HCP 13
- Tournament: 384
- Championship: 362
- Regular: 350
- White: 308
-
Hole #9
Play your tee shot towards the right center of the fairway to avoid the large crossing bunker. The second shot plays uphill so take an extra club.
- PAR 4
- HCP 15
- Tournament: 415
- Championship: 356
- Regular: 331
- White: 292
-
Hole #10
A nice uphill par four. Keep your tee shot left center to set up the best angle of approach. Avoid the right side as a big drop-off right of the fairway collects a lot of balls. The second shot plays up the hill to a narrow green guarded by bunkers short and right.
- PAR 4
- HCP 12
- Tournament: 370
- Championship: 339
- Regular: 331
- White: 282
-
Hole #11
Play your tee shot at the center pole, however the further down the fairway you are the better approach you’ll have to this green. Get the correct yardage for your second shot especially if the pin is in the back of the green.
- PAR 4
- HCP 10
- Tournament: 390
- Championship: 354
- Regular: 334
- White: 294
-
Hole #12
Great 400 + par four. Favor the right center for the best angel of approach. For the second shot add an additional club, this green might be three clubs front to back and narrows towards the back of the green.
- PAR 4
- HCP 2
- Tournament: 445
- Championship: 425
- Regular: 405
- White: 365
-
Hole #13
Risk reward par four. A driver can get you inside 100 yards, or play safe to 150 and take the water out of play. The left side comes up quickly on the second shot to this small well-guarded green.
- PAR 4
- HCP 14
- Tournament: 362
- Championship: 345
- Regular: 325
- White: 288
-
Hole #14
With water guarding the left side the center of the green is a good spot for any pin. This hole can play anywhere from 120 – 190.
- PAR 3
- HCP 16
- Tournament: 183
- Championship: 166
- Regular: 155
- White: 123
-
Hole #15
A great par 5. With this slight dog leg left, favor the right side of the fairway off the tee. There’s water at 125 so if you can clear that stay on the left side for the best angle of approach. If you lay up you’ll be playing your third from 175- 150.
- PAR 5
- HCP 8
- Tournament: 543
- Championship: 472
- Regular: 440
- White: 409
-
Hole #16
This par 4 is one of the more picturesque holes at Willingers GC, its also one of the more difficult holes. The tee shot plays significantly downhill and avoid the two fairway bunkers on the right side. Take an extra club on your second playing up the hill.
- PAR 4
- HCP 6
- Tournament: 419
- Championship: 386
- Regular: 365
- White: 339
-
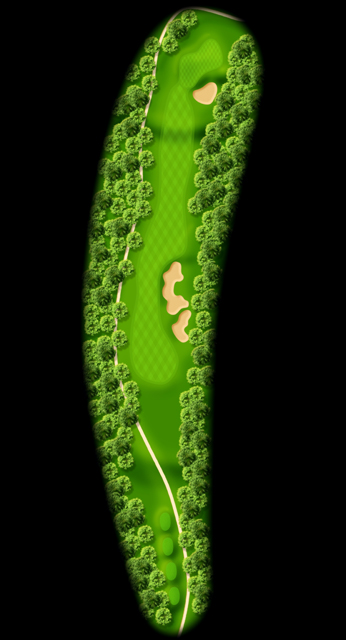
Hole #17
This solid par three it’s the shortest hole on the course. It can play anywhere from 121 to 161 but make sure to judge the wind correctly and the drop in elevation.
- PAR 3
- HCP 18
- Tournament: 166
- Championship: 121
- Regular: 101
- White: 93
-
Hole #18
A great finishing hole and maybe the signature hole at Willingers. Favor the right side off the tee to give yourself a good angle for your second shot. Long hitters might go at this one in two or at least try to carry the crossing bunker. Make sure not miss this green left as its well-guarded by a large bunker and water. 5 is a good score on this finishing hole.
- PAR 5
- HCP 4
- Tournament: 566
- Championship: 500
- Regular: 471
- White: 440